


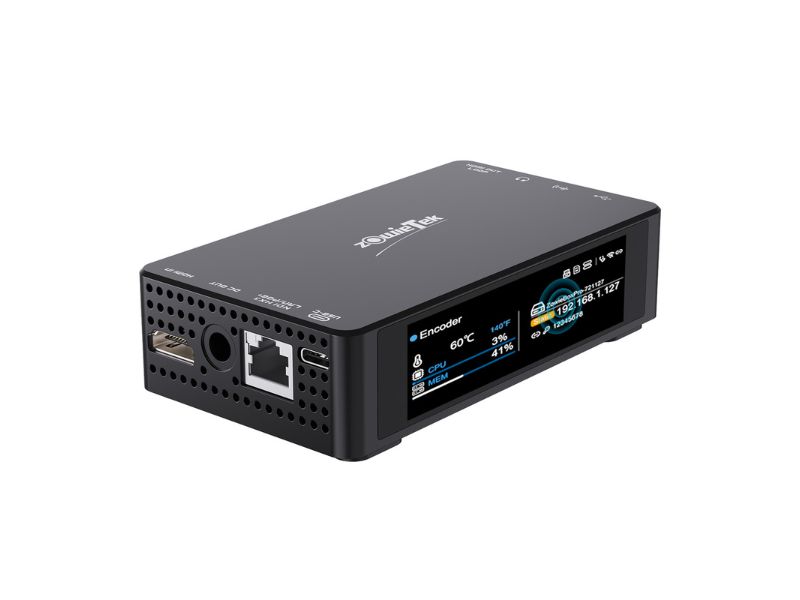
ZowieBox Pro supports two flexible power supply solutions: USB-C Power InputConnect a standard USB-C power adapter (5V–20V wide voltage compatible) to the Type-C Power Input port. The device boots automatically once powered. PoE+ Power SupplyConnect the LAN port to a PoE-enabled network switch via a Cat5e+ Ethernet cable. No separate power adapter is needed. Warning:...
Yes. ZowieBox Pro features a PoE+ compatible LAN port, supporting both data transmission and power delivery over a single Ethernet cable. It works with standard PoE+ network switches, eliminating the need for an external power adapter in fixed installation scenarios.
ZowieX is the unified management tool for all Zowietek devices: Install ZowieX on a computer connected to the same LAN as your ZowieBox Pro. Open ZowieX — it will automatically scan and list all Zowietek devices on the network. Locate your ZowieBox Pro in the list and click to open the web UI directly. Additional...
Default username: admin Default password: admin Tip: For security, please change the default password after your first login in Setting > System > User Account.
Log in to the web UI and go to Setting > Network > LAN. By default, DHCP is enabled — the device obtains an IP automatically from your router. To set a static IP: Switch IP Mode to Static IP Enter your desired IP address, subnet mask, default gateway, and DNS servers Click Save and...
Two off-network access methods are available: Device Hotspot ZowieBox Pro broadcasts a Wi-Fi hotspot by default (SSID: ZowieBoxPro-XXXXX) Connect your phone/computer to this hotspot (default password: 12345678) Open a browser and enter 170.128.88.1 to access the web UI Direct Ethernet Connection Connect the device directly to your computer via Ethernet cable Set your computer’s IP...
Log in to the web UI. Go to Setting > System > Default. Select Factory Restore and confirm the operation. The device will reboot and restore all settings to factory defaults. Note: All custom configurations (network settings, streaming presets, user accounts) will be erased.
Yes. All configuration settings are stored in the device’s internal flash memory. Settings will persist after power loss and automatically restore when the device is powered back on.
Download the latest firmware file from the Zowietek official website. Do NOT unzip the file. Log in to the web UI and go to Setting > System > Upgrade. Click Upload, select the firmware .img file, and start the upgrade. Keep the device powered on during the upgrade process. The device will reboot automatically when...
Prepare a USB drive or TF card formatted as exFAT or FAT32. Extract the firmware file to the root directory of the storage device. Insert the storage device into ZowieBox Pro, then restart the device. The device will detect the firmware file and start the upgrade automatically. Wait for the device to reboot fully before...
Log in to the web UI and go to Setting > System > Working Mode. Locate the USB OTG option and toggle between: Host Mode (default): For USB recording, UVC camera input, and serial control Device Mode: For UVC output (use ZowieBox Pro as a USB webcam) The setting takes effect immediately.
ZowieBox Pro supports encoding and decoding modes (mutually exclusive, cannot run simultaneously): Log in to the web UI. Go to Setting > System > Working Mode. Select Encoder or Decoder as needed. The device will switch modes automatically. You can also access the mode selection screen via the icon in the bottom-left corner of the...
The Nintendo Switch itself does not have a video out port – you cannot connect it directly to ZowieBox, no matter what adapter you try to use. Instead, you must connect it to the special Nintendo Switch Dock that comes with the Nintendo Switch. That Dock has HDMI out. 1) Plug one end of an HDMI Cable into the HDMI...
Connect the HDMI output port of PS5/4 to the HDMI IN of ZowieBox, and also connect the HDMI OUT of ZowieBox to a TV or monitor. Then, visit the Settings > System section of the PlayStation 5/4 interface, and turn off Enable HDCP. After that, you can use your PlayStation 5/4 with ZowieBox .
ZowieBox connects to the Xbox Series using HDMI. It can passthrough video to a TV set also using HDMI. An HDMI cable is included in the box. Before you set things up, make sure to connect your Xbox Series directly to your TV set or display via HDMI, without using ZowieBox. After that, you can use your Xbox Series with ZowieBox .
Log in to the web UI and go to Setting > Video > Output. Enable the Loopout toggle for zero-latency HDMI pass-through (the input signal is output directly without processing). Disable Loopout to use processed/decoded video output. You can adjust output resolution, frame rate, and color space in this menu. Click Save to apply changes.
The DC Out port provides 8.4V power output for auxiliary devices (monitor, PTZ camera, etc.). Go to Setting > System or use the dashboard quick controls to toggle DCOUT on/off. Connect your device to the DC Out port via a compatible cable. Warning: Do NOT use this port to power ZowieBox Pro itself. Keep the...
Ensure the PTZ camera and ZowieBox Pro are on the same network, or connected via serial cable. Go to Setting > PTZ in the web UI. Select your control protocol (VISCA over IP, Serial VISCA, Pelco D, Pelco P, UVC, NDI). Enter the camera’s IP address, port, and address number. Save settings and use the...
Yes, it does. After clicking the “OSD” option on the left column of the web, the page of OSD will be shown as follows. When using the OSD function, please add a canvas first, and the resolution of the canvas can be 3840×2160, 1920×1080, 1280×720, or 720×1280. ZowieBox supports adding up to four canvases. Then you can...
Yes,ZowieBox has the OSD function, which supports users to add custom text and pictures. To switch to a still image, please follow the steps below: Step 1: Log in to the web console of ZowieBox and click Setting->Video->OSD to reach the OSD setting interface. Step2:Click the Add button to add a canvas, and the resolution of the...
The serial port chips currently supported by ZowieBox are FT232 and PL2303. Please use different connection methods for different serial lines: 1. USB to RS232 The pin definition of RS232 is as follows: To ensure that RXD at one end is connected to TXD at the other end, please first check the RS232 interface of...
USB to Gigabit Ethernet adapter or USB Type-C to Gigabit Ethernet adpater are very popular and can be bough anywhere at online or local store. It is compact, very cheap and easy to use
ZowieBox Pro has three adjustable fan modes to balance cooling and noise: Standard Mode (default): Balanced cooling and noise for most scenarios. Silent Mode: Minimal fan noise, suitable for quiet environments like studios and conference rooms. Performance Mode: Maximum cooling for high-load scenarios (outdoor use, long-duration 4K60 encoding). Adjust fan mode in Setting > System...
For ZowieBox , it supports input resolutions and frame rates such as 4k59.94, 4k29.97, 1080p59.94, 1080p29.97, and 1080I59.94. After receiving a decimal frame rate, it will encode it into an integer frame rate for streaming, recording, and output,as shown below: 4k59.94->1080p60, 4k29.97->4k30, 4k23.98->4k24, 1080p59.94->1080p60 1080p29.97->1080p30, 1080p23.98->1080p24, 1080I59.94->1080I60 For ZowiePTZ and ZowieCam, decimal frame rates are...
Connect the HDMI signal source of the computer to the HDMI In interface of ZowieBox. Open computer settings, enter the Display settings interface, and slide down to enter Advanced display settings. Change the display screen that needs to be modified to ZowieBox, and then click Display Adapter Properties. In the pop-up window, select to List...
Please plug the storage device into the computer to see if the file can be played. If it can be played, then please check whether the audio format of the video recording is MP3, if it is MP3, then it is a normal phenomenon. At present, the video preview does not support the preview of...
The Tally on the ZowieBox can indicate the Tally working status when it is in the automatic mode. The indicator status as follows: Note: When the mode of ZowieBox is NDI encoding mode and output to other NDI receivers, such as vMix, OBS, etc. ZowieBox will change the color of the tally light according to...
Yes. ZowieBox Pro’s UVC output follows the standard USB Video Class protocol, which is natively supported by macOS. No additional drivers are required — the device will be recognized as a standard webcam by Zoom, OBS, QuickTime, and other Mac apps.
Use the HDMI to UVC working mode: Switch ZowieBox Pro to Encoder > HDMI to UVC Out mode. Connect your HDMI camera/source to ZowieBox Pro’s HDMI In. Connect ZowieBox Pro’s USB port to your computer (USB OTG set to Device Mode). Open Zoom, go to video settings, and select ZowieBox Pro as your webcam. Audio...
Feature ZowieBox Pro ZowieBox Form factor Rugged aluminum alloy, compact Standard compact design Touchscreen 3.42-inch LCD touchscreen No built-in screen AI features Built-in AI tracking, chroma key No AI processing NDI version NDI 6.3.2, NDI|HX3 NDI|HX2 Power options USB-C, PoE+, DC out USB power only Wireless Wi-Fi 6 + Hotspot Basic Wi-Fi Tally light Large...
After the upgrade, if the LED screen is displayed on the logo interface, the web control interface keeps loading and cannot obtain information after logging in. Please click Setting->System->Default and click Restore Factory Settings.
Log in to the web UI and go to Setting > Video > Encoder. Separate settings are available for Main Stream and Secondary Stream. Select your rate control mode: CBR (default), VBR, or AVBR. Enter your desired bitrate value: Main stream: 64kbps – 51200kbps (default 12000kbps) Secondary stream: 64kbps – 25600kbps (default 6000kbps) Click Save...
Listener Mode (local SRT service) Go to Setting > Streaming > LAN Stream. Locate the SRT Listener section. Configure port, Stream ID, passphrase, and key length. Enable the service — the device will listen for incoming SRT connections. Caller Mode (push to remote SRT server) Go to Setting > Streaming > WAN Stream. Click +...
Adjustable SRT parameters include: Port: Network port for SRT transmission (default 9000 for listener) Stream ID: Identifies the stream path (required for routing) Passphrase: Encryption password for secure transmission Key Length: Encryption strength (16/24/32 bytes) Latency: Buffer delay (200–1500ms) — increase for unstable networks ⚠️ Disable the SRT service before modifying settings; changes take effect...
Set up SRTMiniServer on your receiving computer/server. Configure SRT Listener mode on the server with your chosen port and Stream ID. On ZowieBox Pro, add a new WAN stream with SRT Caller mode. Enter the server’s IP address, port, and matching Stream ID. Enable the stream — ZowieBox Pro will connect to SRTMiniServer automatically.
In OBS, add a Media Source and input the SRT stream URL from ZowieBox Pro (Listener mode). Alternatively, set OBS to SRT Listener mode and configure ZowieBox Pro as SRT Caller to push to OBS. Match port, Stream ID, and passphrase settings on both sides. Adjust latency based on your network stability.
ZowieBox Pro encoding → vMix receiving Set ZowieBox Pro to SRT Listener mode In vMix, add an SRT input using the ZowieBox Pro SRT URL vMix encoding → ZowieBox Pro decoding Set vMix to push an SRT stream On ZowieBox Pro (Decoder mode), add an SRT WAN stream with Caller mode Enter vMix’s SRT server...
Log in to the web UI and go to Setting > Streaming > LAN Stream. The RTSP stream URLs for main and secondary streams are displayed on this page. Click the copy button next to the URL you need. RTSP is enabled by default and cannot be disabled. RTSP authentication can be enabled in the...
Yes. ZowieBox Pro supports three local/network storage options for recording: TF card slot USB 3.0 storage devices NAS network storage (CIFS protocol) ⚠️ Only one storage destination can be used for recording at a time.
Yes. In Encoder mode, you can simultaneously encode live streams (RTMP/SRT/NDI) and record video files to local storage. Both operations run independently without impacting each other, as long as your storage device meets the minimum speed requirement (20MB/s).
Ensure a TF card, USB drive, or NAS is connected and recognized. Go to Setting > Streaming > Record. Configure recording settings: file format (MP4/TS/MOV), file split mode (time/size/disabled), and file prefix. Click the Record button on the dashboard or preview page to start recording. Recorded files can be previewed, downloaded, or deleted in the...
Container formats: MP4 (default), TS, MOV Video codec: H.264 / H.265 (matches encoding settings) Audio codec: AAC Supported file systems: exFAT, FAT32, EXT4 💡 FAT32 has a 4GB maximum file size limit; use exFAT for long uninterrupted recordings.
Two methods available: Account login method: Select YouTube as service, log in directly, and go live. RTMP manual method: Enter YouTube’s RTMP server URL and stream key. Enhanced RTMP is supported for H.265 streaming to YouTube.
Go to Setting > Streaming > WAN Stream and click + Add. Select RTMP(S) protocol. Paste your Facebook Live RTMP server URL and stream key. Configure bitrate and resolution settings. Save and enable the stream to go live on Facebook.
Add a new WAN streaming task with RTMP(S) protocol. Enter the Twitch ingest server URL closest to your location. Paste your Twitch stream key. Set encoding bitrate (recommended 4000–6000kbps for 1080p60). Start streaming.
Add a new WAN stream. Choose RTMP(S) or SRT protocol based on your Wowza server configuration. Enter the Wowza server address, application name, and stream name. Configure authentication if required by your server. Save and start streaming.
Yes. ZowieBox Pro supports simultaneous streaming to multiple destinations: Up to 2 RTMP streams 1 SRT Caller stream 1 SRT Rendezvous stream Local RTSP/SRT services remain active Note: WAN streaming and NDI streaming cannot be enabled simultaneously due to bandwidth limitations.
Yes. You can create multiple separate WAN stream tasks, each with its own YouTube server/key configuration. Save them as presets and enable/disable as needed without retyping credentials.
Ensure stable network connectivity — use wired Ethernet instead of Wi-Fi for streaming. Enable NTP time synchronization on the device for accurate timestamping. If using SRT, slightly increase the latency buffer value. Verify the audio sample rate is set to 48kHz (default) for maximum compatibility. Check YouTube’s stream health dashboard for buffering issues.
Go to Setting > Video > OSD. Click Add Canvas and set the canvas size to match your encoding resolution. Click + Text to add custom text or timestamp: Customize font size, weight, color, stroke, and background Timestamp format is configurable (date first/time first, display format) Click + Image to upload a JPG/PNG overlay (max...
In the OSD menu, click the scoreboard button to add a scoreboard element. Customize font size, color, and display dimensions. Adjust scores in real time via the web UI during live events. Scoreboard updates take effect immediately on the live output stream.
Click the working mode icon in the bottom-left corner of the web UI, or go to Setting > System > Working Mode. Select Decoder. The device will switch modes automatically and reload the interface. Encoding and decoding modes are mutually exclusive.
Ensure ZowieBox Pro is in Decoder mode and NDI is activated. Go to Decoding > NDI. The device will automatically scan and list all NDI sources on the local network. Click the toggle button next to your desired NDI source to start decoding. The decoded video will output via HDMI automatically. Click Discovery to rescan...
No. ZowieBox Pro can only decode one NDI source at a time. You can switch between available NDI sources manually, but simultaneous multi-source decoding is not supported.
ZowieBox Pro does not support decoding Full NDI or NDI|HB streams — only NDI|HX (HX1/HX2/HX3) format is supported. VLC and OBS by default output Full NDI, which is not compatible. Solution: Use NDI Tools Bridge to convert Full NDI to NDI|HX format.
1.Login in to the web console. Switch ZowieBox to decoder mode as shown in the link below https://zowietek.com/knowledge-base/how-to-switch-to-decoder-mode 2.Click Setting->Decoding->Local, and click +Add to add a Local Streaming, such as RTSP, Enter the alias name and streaming URL and click Save. After saving successfully, open the button on the left to start decoding.
Go to Decoding > Failover. Click + Add. Enter an alias name and select the failover type: Image, Video, or URL. Upload your file (JPG/PNG for images, MP4 for videos) or enter the stream URL. Save the failover preset and toggle it on to activate. Total upload size limit: 100MB.
Go to Setting > Audio while in Decoder mode. Adjust the Output Volume slider from 0 to 100. Volume changes apply to both HDMI audio output and 3.5mm line out.
In Decoder mode, go to Setting > Video > Output. Find the Color Space option, and select the target format from the drop-down menu, such as RGB, YUV 4:2:2, etc. You can also adjust output-related parameters such as color range and HDR switch according to your display device. Click Save to take effect. It is...
After successfully decoding the source (SRT/RTSP/RTMP), go to Decoding > NDI Forwarding. Enable the NDI Sender function. Configure the NDI source name and related output parameters. After saving, other NDI devices on the LAN can discover and receive the forwarded NDI stream from this device. This function is used to convert non-NDI streams to NDI...
Deploy an NDI Discovery Server on a server that can be accessed by both network segments. On ZowieBox Pro (Decoder mode), go to NDI > Discovery Settings. Enable NDI Discovery and enter the IP address of the NDI Discovery Server. Save the settings and restart the NDI function. ZowieBox Pro will register and discover NDI...
How to decode RTMP/RTSP Stream Step 1: Switch to Decoder Mode Log in to the ZowieBox web console. Switch the device mode to Decoder Mode. How to switch to Decoder mode? Step 2: Add and Start the Stream Navigate to Setting Decoding WLAN Click + Addto add a new Local Streaming Enter an Alias Nameand the Streaming...
Ensure NDI is activated on your device (go to Setting > System > NDI to verify). Switch to Encoder mode. Go to Setting > Streaming > LAN Stream. Select your desired NDI quality: NDI|HX1, NDI|HX2, or NDI|HX3. Click Save and enable the NDI stream. WAN streaming (RTMP/SRT) will be automatically disabled when NDI is active.
Go to NDI Sender settings. Enable Multicast. Configure multicast IP (default 239.255.0.0), subnet mask, and TTL. Save settings. Note: Ensure your network switch/router supports IGMP multicast, otherwise NDI devices may not be discoverable.
Deploy the official NDI Discovery Server program on a server or computer that can communicate with all target network segments. On each NDI device (including ZowieBox Pro), configure the NDI Discovery Server address uniformly. On ZowieBox Pro, enter the NDI settings page, enable Discovery, and fill in the server IP. All devices will register their...
Install the official OBS NDI plugin on your computer running OBS Studio. Make sure the computer and ZowieBox Pro are on the same LAN. Enable NDI output on ZowieBox Pro (Encoder mode). Open OBS, add a new source and select NDI Source. In the source configuration, select the NDI source named after ZowieBox Pro from...
Ensure that vMix and ZowieBox Pro are in the same local area network. Enable NDI output on ZowieBox Pro and keep it in Encoder mode. Open vMix, click Add Input > NDI / NDI|HX. vMix will automatically scan all NDI sources in the LAN, find the corresponding ZowieBox Pro source and select it. After adding,...
Feature NDI|HX1 NDI|HX2 NDI|HX3 Generation First Second Third (latest) Compression efficiency Baseline Improved Highest Latency Higher Lower Lowest Bandwidth usage Higher Medium Lowest
ZowieBox Pro only supports NDI|HX series streams. Full NDI and NDI|HB sources need to be converted by NDI Tools Bridge before they can be decoded normally. Download and install NDI Tools on a computer in the same LAN. Run the NDI Bridge function. Add the target Full NDI / NDI|HB source as the input source....
Go to the NDI advanced settings page. Find the NDI Group option, fill in the custom group name. Devices in the same group can discover each other, and devices in different groups are isolated from each other. To enable multicast mode, turn on the Multicast switch, and configure the multicast IP address and TTL parameters....
The table below shows the reference bitrate of NDI streams at common resolutions and frame rates (at 125% quality setting, unit: Mbps): Resolution Frame Rate NDI|HX1 NDI|HX2 NDI|HX3 1080p 30fps 12 8 6 1080p 60fps 22 16 13 2160p (4K) 30fps 45 34 28 2160p (4K) 60fps 110 55 28 The actual bitrate can be...
No. Due to hardware bandwidth and processing limitations, NDI streaming and WAN RTMP/SRT streaming cannot be enabled at the same time. Local services (RTSP, SRT Listener) and local recording remain active alongside NDI.
NDI® 6 (Network Device Interface) is the latest and most significant evolution of the industry-standard IP video protocol developed by Vizrt. While previous NDI versions were primarily optimized for high-speed local area networks (LANs), NDI 6 breaks those boundaries by natively integrating professional **WAN (Wide Area Network) connectivity** and broadcast-grade **HDR (High Dynamic Range)** color...
NDI License & Feature Usage Guide Troubleshooting: NDI License Missing After Firmware Update Affected Versions:May occur when updating from firmware versions prior to v2.0.0.48. Resolution: Perform a factory reset on the device. Upgrade to 0.0.48 or lateras soon as possible (this issue is resolved in v2.0.0.48 and above). Feature Updates & Optimizations NDI Settings Relocation...
